Teams Page
You must be a Subscription Administrator to access the Teams page.
The Teams page allows you to view the members of a team, and to add, edit, or delete a team.
A team is a set of practitioners that you—as a Subscription Administrator—can set up in order to give users the ability to quickly grant client permissions to a specific set of users—the team members. After a team has been set up, users with Owner client permission can grant client permissions to that team just as they would to an another individual user.
Only practitioners can be added to a team. Subscription Administrators have unrestricted client management rights to all clients in the system. So, team membership for Subscription Administrators would be meaningless. To add users to a team, see Adding a User to a Team. See also, Adding Many Users to a Team.
Adding a Team
- Click Add Team in the top left of the page. The Add Team Page opens.
- Complete the fields.
- Click Save.
For more details, see the Add Team Page.
Changing the Name or Description of a Team
- Click the ellipsis icon in the first column next to the team to be changed. A shortcut menu opens.
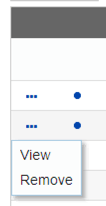
- Click View. (Alternatively, you can click the team name link in the Team column.) The Edit Team page opens.
- Click Edit next to the item to be changed.
- Make the necessary changes and then click Save.
To add users to a team or remove users from a team, on the Teams page, click the name of the team and use the Edit Team page.
Removing a Team
Removed teams will remain in your Recycle Bin until they are either purged or restored.
- Click the ellipsis icon in the first column next to the team to be removed. A shortcut menu opens.
- Click Remove on the shortcut menu.
- Click Remove on the confirmation message.
Seeing the Number of Clients a Team has Access to
- Using your mouse, point the cursor at (hover over) the “dot” icon in the second column next to the team name. A tool tip appears indicating the number of clients the team has access to.
- Move your cursor away from the “dot” icon to make the tool tip disappear.
Setting Firm-Wide Permissions Policies
You can specify permission policies (firm-wide default settings) on the Policies Page in the Admin section of the program. For information on how users grant client permissions to other users or teams, see Edit Client Page > Permissions Tab. See also, Grant Client Permissions to Other Users.
Sorting the Items
- Click a column heading. For example, to sort the items by description, click the Description column heading.
- To toggle the sort order between ascending and descending, click the column heading again. When the arrow next to the column heading is pointing up, then the sort order is ascending. If the arrow is pointing down, then the sort order for that column is descending.
Filtering the Items
- Type a value in one or more of the search fields under the column headings.
- Press Enter.
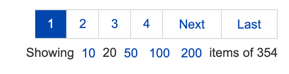
Scrolling Through the Items
Click one of the links in the navigation panel at the bottom of the page.