Clients Page
The Clients page shows all the clients you have access to.
Customizing the Clients Page
Sorting the Client Records
You can sort the records on the Clients page by clicking the column headings. For example, to sort the records by last name, click Last Name. Note that when the arrow next to the column heading is pointing up, then the sort order is ascending. If the arrow is pointing down, then the sort order for that column is descending. Each time you click the column heading, the sort order toggles between ascending and descending.
Filtering the Client Records
- Type a value in one or more of the search fields under the column headings.
- Press Enter.
Specifying the Columns Displayed
- Click Columns on the right side of the page.
- Click to put a check mark in the boxes next to the columns to be displayed, or clear the check boxes to hide the columns. (The Last Name, First Name, and Plan columns are displayed by default.)
- After making your selections, click Apply.
Scrolling through the Client Records
Click one of the links in the navigation panel at the bottom of the page.
Adding a Client
- Click Add Client at the top left of the page.
- Then, follow the directions on the Add Client Page.
When you add a client, you have Owner permission to the client by default. For more about permissions, see Permissions.
Editing a Client
You must have Editor or Owner client permission or be a Subscription Administrator to save changes to a client. For more about permissions, see Permissions.
- In the first column next to the client to be edited, click the ellipsis icon.
- In the pop-up menu, click View. (Alternatively, you can click the Last Name link of the client to be edited.)
- The Edit Client page opens.
- Click Edit next to the data to be changed.
- Make the necessary changes and then click Save.
Granting Client Permissions to Other Users
You can use the Permissions Wizard to grant client permissions to other users.
- Click Permissions Wizard in the upper left corner.
- Complete the panels in the wizard. For detailed instructions, see Permissions Wizard.
Removing a Client
To remove a client, you must have Owner permission or be a Subscription Administrator. For more about permissions, see Permissions. When you remove a client, you will no longer have access to any of that client’s plans. That is, all plans associated with the client will also be removed from the system.
- In the first column, click the ellipsis icon next to the client to be removed.
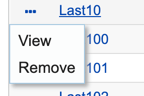
- Click Remove on the shortcut menu. The following message opens:
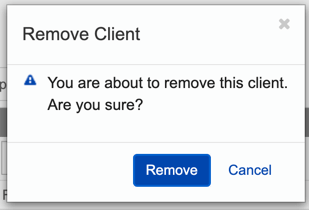
- Click Remove to confirm that you want to remove the client. The client is removed.
Removed clients (and plans) remain in your Recycle Bin until you either restore them or purge them from your Recycle Bin. For more information, see Recycle Bin Page.
Creating a New Plan for a Client
- Using your mouse, move the cursor to the right of the Plan column. (Be sure that the cursor is in the appropriate client row.)A chevron appears.
- Click the chevron. A pop-up menu shows the most recently saved plans and an option for adding a new plan.
- Click New Plan. Income Tax Planner opens.
- Create the new plan and save it.
Opening a Plan for a Client
- Using your mouse, move the cursor to the right of the Plan column. (Be sure that the cursor is in the appropriate client row.) A chevron appears.
- Click the chevron. A pop-up menu shows the most recently saved plans and an option for adding a new plan.
- To open a plan, click the plan name on the pop-up menu.
Recent Plans
You can also open a recently accessed plan from the Recent Plans menu:
- Click Recent Plans on the right side of the page. A pop-up menu opens, showing the ten most recently saved plans (along with the client’s name).
- In the pop-up menu, click the plan to be opened.