Letter Templates Page
The Letter Templates page shows all the client letter templates available to you. On this page, you can import letter templates from your local or network drive and you can remove letter templates.
About Letter Templates
Letter Templates are “form letters” that you can use to simplify the process of writing client letters. For example, if you created a letter for a client from within Income Tax Planner and you want to create the same or similar letter for other clients, save the letter as a template by using the Save Letter Template As command on the Planner’s File menu. Saved templates appear on the Letter Templates page, and the templates will be accessible from within the Planner by selecting the Open Letter Template command on the File menu. For more help on using templates, see the Template help articles in Income Tax Planner.
Importing a Client Letter Template
Importing a template is useful if you previously saved templates using Income Tax Planner (desktop edition) and now you want to make those templates available in Income Tax Planner Web.
You cannot edit a letter template on this page. To edit a letter template, first launch a client plan and then see “Editing a Letter Template” help article in Income Tax Planner.
- On the Letter Templates page, click Import. The following field appears:
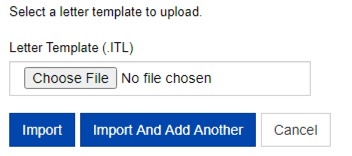
- Click Browse and then locate the template file to be uploaded. Template files have the “.itl” extension.
- After selecting the template of your choice, click Import (or Import And Add Another).
Removing a Letter Template
- Using your mouse, point to the ellipsis icon next to the template to be removed.
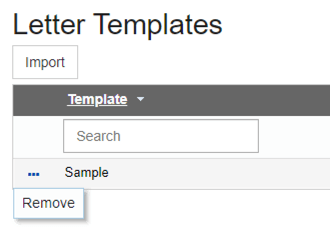
- Click the chevron that appears next to the ellipsis icon.
- On the menu that appears, click Remove.
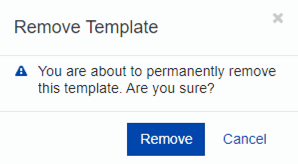
- On the confirmation message, click Remove to confirm that you want to remove the template.
Sorting the Items
You can sort the items by clicking the column headings. Each time you click the column heading, the sort order toggles between ascending and descending. When the arrow in the column heading is pointing up, the items are sorted from A to Z. When the arrow is pointing down, the items are sorted from Z to A.
Filtering the Items
- Type a value in the Search field under the Template heading.
- Press Enter. Only the items containing the entered value are shown.
- To show all the items again, clear the Search field and press Enter.
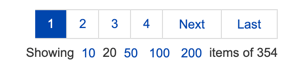
Scrolling Through the Items
Click one of the links in the navigation panel at the bottom of the page.