Personal Plans Page
The Personal Plans page, accessible from the Clients page, is a secure area where you can create and work with personal plans that only you can access. No one – not even your Subscription Administrator – can gain access to your personal plans.
Your Subscription Administrator specifies whether Personal Plans are enabled or disabled for your firm. If disabled, the message “Personal Plans are currently disabled.” is displayed on the Personal Plans page.
Setting Up Your PIN and Security Questions
Upon first accessing the Personal Plans page, you must create a 4- to 6-digit PIN (Personal Identification Number). You must also choose personal security questions and answers in case you forget your PIN, as Bloomberg Tax Technology Customer Support cannot assist you in recovering your PIN.
- Enter a 4- to 6-digit number in the PIN field. Only numerical characters (0-9) are allowed.
- Re-enter your PIN in the Confirm PIN field.
- In the Security Question 1 field, click the down arrow.
- In the drop-down list, click to select a question.
- In the Security Answer 1 field, type the answer to Security Question 1. Security answers are not case-sensitive, may contain any combination of alphabetic, numerical, or special characters, and must be comprised of 3-20 characters. Your Subscription Administrator cannot override or see the answers to your security questions.
- In the Security Question 2 field, click the down arrow.
- In the drop-down list, click to select a question.
- In the Security Answer 2 field, type the answer to Security Question 2. It is important that you remember the answers to your security questions. See Forgotten Answers to Your Security Questions, below.
- Click Save.
Resetting Your PIN
Resetting your PIN may be necessary if you have forgotten it. You are allowed ten (10) attempts to enter your PIN correctly. After entering an incorrect PIN ten (10) times, you will be prompted to reset your PIN by first answering your security questions. Note that for security reasons Bloomberg Tax Technology Customer Support cannot assist you in recovering your PIN.
- On the Personal Plans page, click Reset Your PIN.
- Enter the answers to your security questions in the fields provided.
- In the PIN field, enter a new 4- to 6-digit PIN. Only numerical characters (0-9) are allowed.
- In the Confirm PIN field, enter your new PIN again.
- Click Reset PIN.
Forgotten Answers to Your Security Questions
If you have forgotten the answers to your security questions, you will be unable to access your personal plans. By design, Bloomberg Tax Technology Customer Support cannot assist you in recovering the answers to your security questions. However, if you require assistance in regaining access to your personal plans, feel free to contact our technical support team at 800.424.2938 but note that charges will apply.
Creating a New Personal Plan
- On the Personal Plans page, click New. If you are prompted to install the Turbo plug-in, follow your browser-specific instructions to install it. Installing the Turbo plug-in is required only once.
- In the Planner, create the new personal plan and save it.
- Close the Planner.
- Refresh your browser to see the new personal plan on your Personal Plans tab.
Importing a Personal Plan
If you have previously saved a personal plan file (.it file) on your local or network drive using the desktop program edition, you can import the plan to Income Tax Planner Web.
- On the Personal Plans page, click Import Personal Plans.
- Follow the instructions on the Add Plans dialog.
- After selecting the plans, click Close to close the Add Plans dialog.
Opening a Personal Plan
On the Personal Plans page, either click the personal plan link or click the ellipsis icon in the first column and select Open on the shortcut menu.
Viewing a Personal Plan as a PDF File
You can view a personal plan as a PDF file. This is useful if you want to view a personal plan from an iPhone or iPad. When you save a plan in the Planner, a PDF file of the plan is automatically generated. In order for the PDF file to be saved, you must have a default printer installed when you save the plan.
- On the Personal Plans page, click the ellipsis icon next to the plan to be viewed as a PDF file.
- On the shortcut menu, click View as PDF. (If the View as PDF option is not enabled, you must first open the plan and re-save it. Then, close the Planner and refresh your browser window to view the updated Setup page.)
- Follow your browser-specific instructions to view or save the PDF file.
Exporting a Personal Plan
If your Subscription Administrator has enabled this feature, you can export a personal plan to your local or network drive so that it can be accessed with the desktop program edition (this is useful only for firms that subscribe to both the Web and desktop program editions, typically for a brief transition period) or imported to another client in the Web program edition.
- On the Personal Plans page, click the ellipsis icon next to the plan to be exported.
- On the shortcut menu, click Export. The program converts the client plan to a .it file.
- Follow your browser-specific instructions to save the personal plan (.it file) to a folder on your local or network drive.
Removing a Personal Plan
Removing a personal plan is a permanent action and cannot be undone.
- On the Personal Plans page, click the ellipsis icon in the first column next to the personal plan to be removed.
- Click Remove on the shortcut menu. The following message opens:
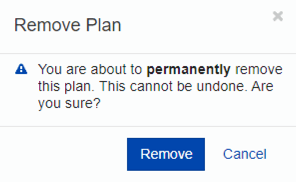
- Click Remove to confirm your decision to delete the plan. The plan is permanently removed.
Renaming a Personal Plan
- One the Personal Plans page, click the ellipsis icon in the first column next to the personal plan to be renamed.
- Click Rename on the shortcut menu. The Rename Plan dialog opens.
- In the Plan field, enter the new name of the plan and then click Save.
The plan name must not include any of the following special characters: \/:*?"<>|
Sorting the Items
You can sort the items by clicking the column headings. Each time you click the column heading, the sort order toggles between ascending and descending. When the arrow in the column heading is pointing up, the items are sorted from A to Z. When the arrow is pointing down, the items are sorted from Z to A.
Filtering the Items
- Type a value in the Search field under the Plan heading.
- Press Enter. Only the items containing the entered value are shown.
- To show all the items again, clear the Search field and press Enter.
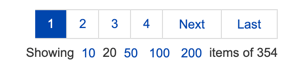
Scrolling Through the Items
Click one of the links in the navigation panel at the bottom of the page.